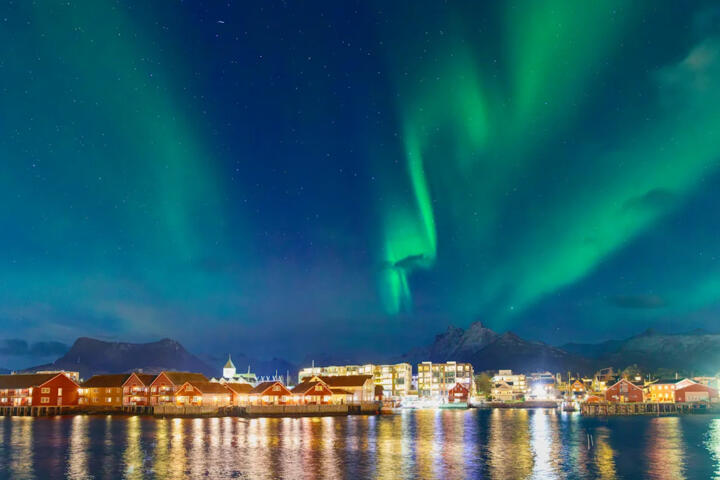
Northern Lights In Cities
Northern Lights viewing in urban areas depends less on luck than on managing three constraints: light pollution, cloud cover, and your ability to keep equipment steady in cold air. Cities can still show aurora, but the visible portion often looks faint and short-lived compared with dark-sky locations. A practical urban setup focuses on collecting enough light, reducing glare, and staying comfortable long enough to catch changes.
For example, if you stand near a streetlight, your eyes adapt to the bright source and the aurora can fade from view even when it is present. Moving 50–200 meters away from the brightest lights often changes what you can see. If you plan to photograph, you also need a stable platform because low-light exposures magnify hand shake, and cold temperatures can drain batteries faster than expected.
Urban viewing also changes how you interpret forecasts. Many aurora apps report geomagnetic activity and probability, but they cannot predict local clouds or the exact brightness you will see through haze. Your gear choices should support quick adjustments: a warm layer system, a camera plan that works at higher ISO, and a way to check sky conditions without constantly walking back to a warm car.
Common Gear And Setup Mistakes
People often buy gear for “aurora” without matching it to the realities of city skies. The first mistake is assuming that a phone camera will behave like a dedicated low-light camera. Phones can capture aurora under some conditions, but many models struggle with long exposures, aggressive noise reduction, and limited manual control. When the phone’s software averages frames, faint aurora can get smoothed away.
The second mistake is ignoring stabilization. A tripod helps, but only if it stays rigid on uneven pavement and if you use a remote shutter or a timer to avoid vibration. In cold weather, even a slight touch can shift framing, and the resulting blur becomes obvious at high ISO. A third mistake is packing for comfort but not for battery performance. Lithium batteries lose capacity in cold air, and camera batteries can drop faster than phone batteries because camera power draw is higher.
The fourth mistake is relying on a single forecast source. Aurora visibility depends on geomagnetic conditions and atmospheric transparency. If you only check one app, you may miss a mismatch between predicted activity and local sky conditions. Cloud cover and haze often dominate in cities, and a “green” forecast can still produce a blank sky if the horizon is obscured.
Urban viewing also introduces safety and logistics dependencies. You may need to cross streets, stand near railings, or wait in public spaces where rules vary by city. Gear should not create trip hazards, and cables should be managed so you do not snag them while adjusting settings.
Gear And Methods That Work
Clothing, Comfort, And Safety
Dress for long waiting, not just the moment you step outside. Use a layered system: a moisture-wicking base, an insulating mid-layer, and a wind-resistant outer layer. Add gloves that let you operate camera controls; thin touchscreen gloves often fail when you need to press physical buttons. A small hand warmer pocket can keep fingers responsive for 30–90 minutes, which matters when you change settings.
For urban safety, choose a viewing spot with clear footing and a nearby warm exit. Keep a compact headlamp with a red mode to reduce glare, since white light can ruin night adaptation for you and others. If you bring a tripod, spread the legs fully and avoid placing it where it blocks sidewalks. In cold weather, condensation can form on lenses when you move between warm indoor areas and outdoor air; a lens cloth and a small zip bag help manage that.
Battery planning is part of comfort. Keep spare camera batteries inside an inner pocket close to body heat, and swap them when performance drops. If you use a phone, a small power bank in a warm pocket can extend runtime, since cold reduces charging efficiency.
Camera Settings For City Skies
Start with a stable setup: tripod, manual focus, and a shutter release or timer. In cities, light pollution raises the background, so you often need shorter exposures than you would in dark skies to avoid washing out the sky. A common starting point for a full-frame or APS-C camera is 10–20 seconds at ISO 800–3200, then adjust based on histogram and test shots. For phones, use the longest supported exposure mode, but expect more noise and less control.
Manual focus matters because autofocus can hunt under low contrast. Use live view to focus on a bright distant object or a star if visible. If you have a lens with a wide aperture, it helps gather light, but wide open can also increase coma and edge softness. Stopping down slightly, such as from f/1.8 to f/2.8, can improve sharpness while still keeping exposures manageable.
Use a consistent frame and check results quickly. Take a short test shot, review brightness, and adjust ISO or exposure time. If the sky looks gray rather than dark, reduce exposure time first. If stars are sharp but aurora is faint, increase ISO gradually. On one trip in March 2024, I used a Sony ILCE series camera with firmware 3.00 and found that the histogram clipped quickly near streetlights, so I reduced exposure time before raising ISO again.
Apps, Forecasts, And Cross-Checks
Use aurora forecasts as a planning tool, not a guarantee. Look for geomagnetic activity indicators and compare them with local cloud expectations. Many apps show KP index, aurora oval estimates, or probability bands, but they differ in how they model brightness. Cross-check at least two sources so you can spot when one forecast is optimistic about visibility.
For sky conditions, check a cloud map that shows cloud cover by altitude and a separate wind or haze indicator when available. Urban haze can scatter light and reduce contrast even when clouds are thin. If your city has frequent low clouds near the horizon, prioritize locations with a clearer view of the northern sky and avoid valleys.
When you arrive, confirm that the sky is dark enough for your gear. A quick test is to photograph a familiar landmark at night and compare exposure to your normal settings. If the background is too bright, you can move to a darker street or change your framing to reduce direct light sources.
Case Examples From Realistic Scenarios
Phone Viewer Near A Main Road
An urban traveler in a northern European city plans to view from a sidewalk near a busy road. They bring a tripod-compatible phone mount, a small power bank, and a red-mode headlamp. The aurora appears as a faint green tint only after they walk away from the brightest streetlight and adjust the phone’s night mode to its longest exposure. Their first photos look washed out because the frame includes a lit intersection, so they recompose to reduce glare and take shorter bursts. The result is not a dramatic display, but the aurora becomes visible in the sky and in the phone’s edited images.
Camera Setup On A Cold Winter Night
A couple in a mid-sized city uses an interchangeable-lens camera with a wide-angle lens. They arrive before the peak forecast window and set up a tripod on a stable patch of pavement. They keep spare batteries inside a jacket pocket and swap them after the first hour when the camera’s battery indicator drops faster than expected. They take test shots every 10–15 minutes, adjusting exposure time to prevent overexposure from nearby building lights. When clouds thin, the aurora becomes clearer, and their photos show more contrast after they reduce ISO slightly and shorten exposure to keep the sky from turning gray.
Urban Aurora Checklist And Tradeoffs
| Gear Choice | What It Improves | City-Specific Limitation | Practical Check |
|---|---|---|---|
| Tripod + Remote/Timer | Reduces blur during long exposures | Street vibrations and uneven ground | Take a 5–10 sec test shot and zoom to check sharp edges |
| Wide-Angle Lens | Captures more sky and aurora movement | Edge distortion and coma at wide apertures | Focus on a bright distant object and check corners for softness |
| Manual Focus | Prevents focus hunting | Focus can shift as temperature changes | Recheck focus after 30–45 minutes if the lens warms/cools |
| Battery Management | Maintains camera runtime | Cold reduces capacity and charging speed | Keep spares warm and track battery drop rate during the first hour |
If you prefer a step-by-step approach, use this sequence: choose a darker spot away from direct streetlights, set up tripod and framing, focus manually, take a test exposure, adjust to keep the sky from over-brightening, then repeat tests as clouds and brightness change. This routine prevents the common “set it once and wait” failure mode, which often happens when the city lighting shifts or the aurora fades.
Common Mistakes To Avoid
One frequent mistake is using a bright flashlight to check settings. That resets night adaptation and can make the aurora harder to see for the next 10–20 minutes. Use red light or cover the beam, and plan adjustments before you switch on any strong light.
Another mistake is leaving autofocus on. Phones and cameras often lock focus on bright edges, and the aurora becomes a soft smear. Manual focus plus a quick test shot reduces wasted time. People also overexpose because they want a visible display; in cities, overexposure turns the sky into a uniform gray and hides contrast.
Some viewers forget that condensation can ruin a lens. Moving from warm indoor spaces to cold streets can fog glass, especially in humid weather. A lens cloth and a short acclimation period in a bag can prevent fogging from becoming a recurring problem.
Finally, many people underestimate how quickly they get cold. If you cannot feel your fingers, you stop adjusting settings and stop taking test shots. A small frustration—like gloves that do not grip camera controls—can cost the best window.
FAQ
What Gear Helps Most In Cities?
A tripod or stable support, manual focus, and a way to reduce glare from nearby lights usually improve results more than buying a higher-end camera alone.
Can I Photograph The Aurora With A Phone?
Yes in some conditions, but results depend on the phone’s night mode limits, exposure control, and how much light pollution enters the frame.
How Do I Choose A Tripod For Cold Nights?
Pick a sturdy tripod that stays rigid on pavement and supports your camera weight; add a remote shutter or timer to avoid vibration when starting exposures.
Do Aurora Apps Predict Exact Visibility?
No. They estimate geomagnetic activity and sometimes probability, but local clouds, haze, and city lighting determine what you actually see.
What Settings Should I Start With?
Begin with a test exposure that avoids washing out the sky, then adjust ISO and exposure time based on your histogram and the sharpness of stars or distant landmarks.
Author's Insight
Urban aurora viewing is a measurement problem disguised as a sightseeing problem. Light pollution raises the background, so your gear choices should prioritize contrast control, stabilization, and repeatable test shots. Forecast apps help you pick windows, but they cannot replace local sky checks for clouds and haze.
For cameras, the practical workflow matters more than any single “best” setting. Manual focus, short test exposures, and careful exposure time selection often produce more usable images than long exposures that clip the sky. For comfort, layered clothing and battery management reduce the chance you stop adjusting gear at the moment aurora brightness changes.
Key Takeaways
- In cities, manage glare and background brightness before chasing higher ISO or longer exposures.
- Stability beats guesswork: tripod, remote/timer, and manual focus improve consistency.
- Plan for cold battery performance and finger control, not just temperature.
- Cross-check forecasts with cloud and haze expectations, then use test shots to confirm what your setup can capture.